
Use one of the two methods below to add Custom Columns to a project spreadsheet.
Custom Columns can be added directly from within the project spreadsheet or through Admin Settings.
Custom Columns are only used to show information. They cannot perform calculations.
Note: The information entered only appears within the project spreadsheet and will not print on any AQ reports.
Add Custom Columns and Headers from the Project SpreadsheetUse the steps below to add Custom Columns to a project spreadsheet and name the column headers.
Step 1 — Open the project.
Click the Projects tab.
Inside the Projects screen, open a project by double-clicking it or by clicking the New button to create one.
A new window will open displaying the spreadsheet for the project.
Step 2 — Open Choose Columns.
Select the Choose Columns button in the top ribbon.

Step 3 — Make the Custom Columns visible.
In the Column Chooser dialog, move the custom column options from the Hidden Columns section to the Visible Columns section.
Press OK when finished.
.png?width=446&height=532&name=IMAGE_2_AQ_Column_Chooser_Custom_Columns%20(1).png)
The custom columns should now be visible in the project spreadsheet.
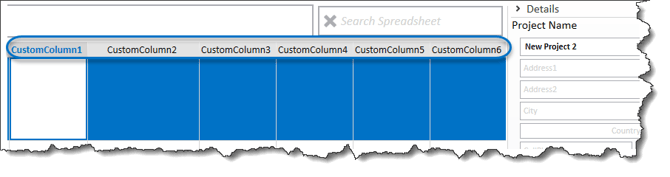
Step 4 — Name the column headers.
To give the columns a more meaningful name, right-click the column header and select Set Custom Column Header.

Enter the Custom Column name.
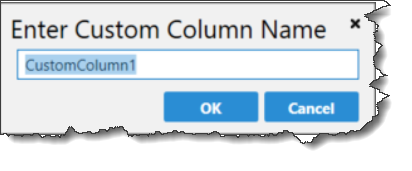
Note: The header names only appear within the current project.
To set permanent header names and create additional drop-down options, you will need to access Admin Settings.
Add Custom Columns and Headers through Admin SettingsUse the steps below to assign permanent header names to Custom Columns.
Step 1 — Open Admin Settings.
Click Admin Settings at the bottom of the main Projects screen.
Step 2 — Open Company Settings.
Click the Company Settings button located in the top ribbon.
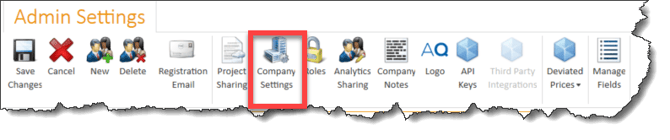
Step 3 — Name the Custom Columns.
In the Company Settings window, select the Custom Columns option to begin creating custom column names.
Press the checkmark when finished, or follow the instructions below to add drop-down menus to the Custom Columns.

Add Drop-Down Menus through Admin Settings
Use the steps below to add drop-down menus to the Custom Columns.
Step 1 — Open the drop-down settings.
Add drop-down menus to the columns by pressing the ellipsis button to the right of the label.
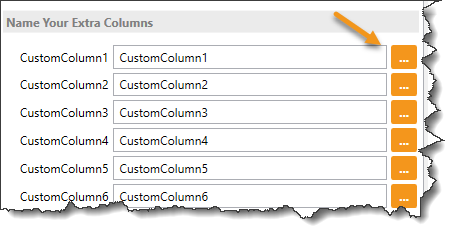
Step 2 — Add the drop-down values.
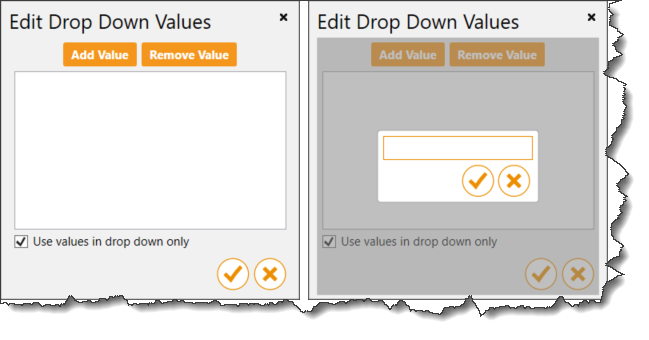
Click the Add Value button from the Edit Drop Down Values dialog to type in the drop-down values.
Step 3 — Save the values.
Press the check buttons to save your entered values.
The drop-down menus will now appear in your project spreadsheets.

Watch the Video
AQ Basic Training Chapter 10 — Project Navigation & Toolbars