
The ability to set custom fields makes AQ a powerful workflow management tool, allowing you to create standards for managing the way your organization works.
This article covers:
- Project Fields Administration
- Modifying and Sorting Fields
- Required Fields
Note: All Project Field-related management happens in Admin Settings.
Step 1 — Open Admin Settings.
Click Admin Settings in the Navigation Bar.

Step 2 — Open Manage Fields.
Select Manage Fields in the top ribbon.

Modifying and Sorting Fields
You can customize the information displayed in Project Fields by adding new values and removing fields from the lists.
Initially, there are default values applied to the Status and Marketing Category fields.
Note: Default values can be removed.
Add Values
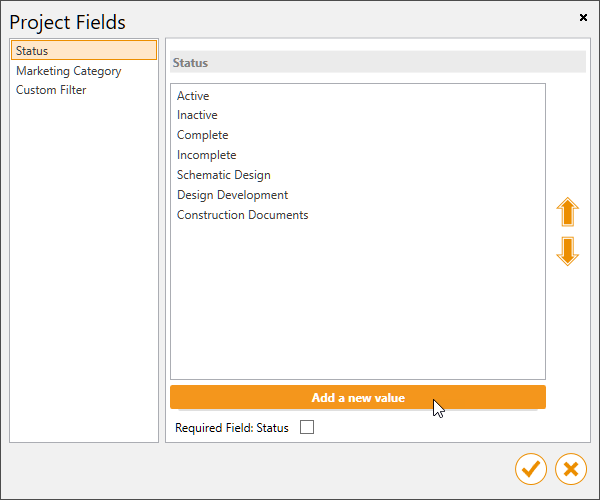
- Go to Admin Settings and click the Manage Fields icon on the ribbon to open the Project Fields window.
- Select the Project Field on the left that you want to add the new value to.
- Click Add a new value.
You will see your new value appear in the list.
Remove Values
- Go to Admin Settings and click the Manage Fields icon on the ribbon to open the Project Fields window.
- Select the Project Field you want to remove the value from.
- Hover over the selected value.
- Click the X that appears to the right of the value to delete it.
Note: Default values can be removed.

Sort the List
- Click the name of the value you want to sort from your values list.
- Click the arrow to the right to move the value up or down.
Note: You can also drag values up or down.
Required FieldsAdmins can select which Project Fields are mandatory on all projects.
The following fields can be marked as required:
- Project Name
- Project Address
- Customer
- Code
- JobRef
- Status
- Marketing Category
- Custom Filter
You can rename the Custom Filter under Manage Fields.
Make Project Fields Required
- Go to Admin Settings.
- Click the Company Settings icon on the ribbon.
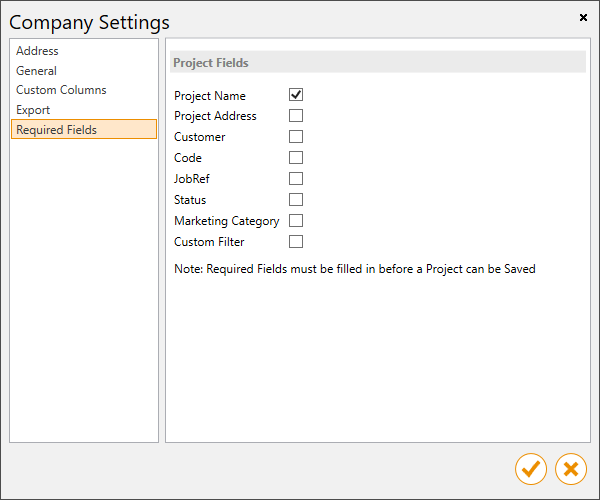
- Select Required Fields.

Select the Project Field or fields you want to be required.
When selected, required fields are indicated by a check mark.
Additional Notes
The New Project dialog will update when the following fields are marked required:
- Project Name
- Status
- Marketing Category
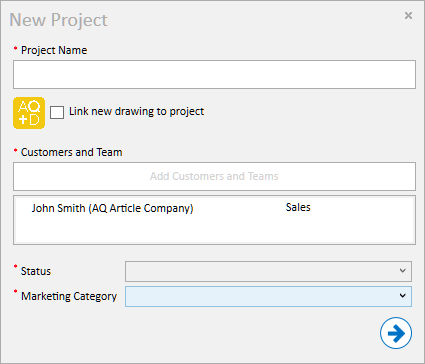
As the Project Name field is required, it must be filled out before a project can be created.
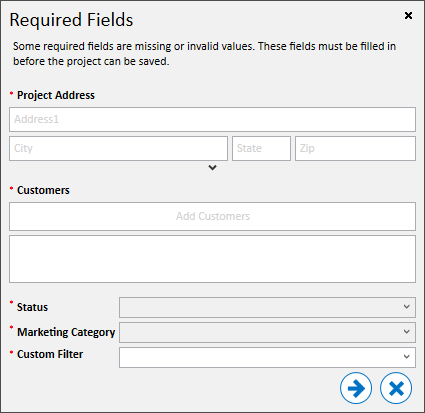
If selected, the Customer, Status, and Marketing Category fields will be required to save a project, but are not required to create the project.
Selecting the X on the message will bypass those fields for now and allow you to start work on your project.
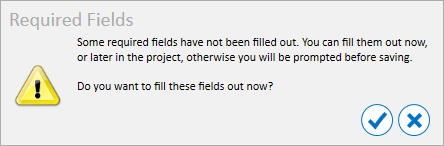
Users will be prompted to fill out any required fields before the project can be saved.
Watch the Video
AQ Basic Training Chapter 10 — Project Navigation & Toolbars